


Data Recovery
Learning how to recover lost data in Windows 10 is important, because if not handled correctly, and in the absence of knowledge on the right approach to the issue, it could result in the loss of critical files.
While deleted files are only a fragment of the resulting factor for data recovery, the most common data recovery circumstances originate from an unexpected interruption of the data transmission process caused by an Operating System (OS) failure of some sort. Logical or physical damages impacted on the file system of either one of the storage units involved in the communications link are usually the probable reasons for data recovery.
Below are several highlighted ways through which you could retrieve lost files on your Windows PC:
Windows Freeware
Firstly, you would look at free Windows utility software created for such purposes as data recovery. It is important to note that this process is the simplest, but just like every other free thing, it is not reliable and therefore subject to several setbacks. However, if you are not tech-savvy and do not trust free software or cannot afford to pay for premium software to recover your files, then this approach is best for you.
Restoring From a Backup
This data retrieval mechanism employs a procedure of restoring lost or deleted files from a backup – providing that you have Windows backup enabled. You can follow these simple steps to do this.
STEPS:
> Click on the Start button.
> Scroll down on the list of programs to find a folder with the name tag “Windows System.”
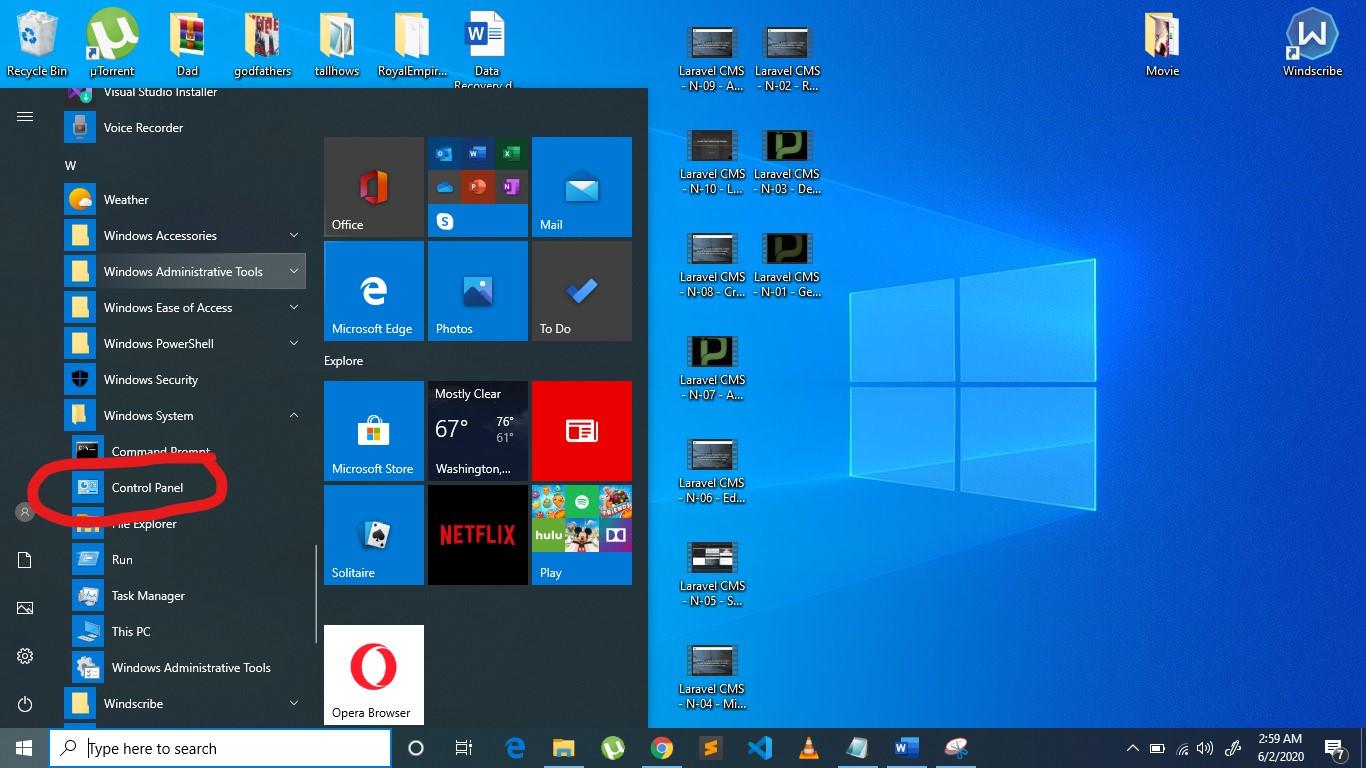
> Hit Control Panel.
> Choose System and Security.
> Select Backup and Restore.
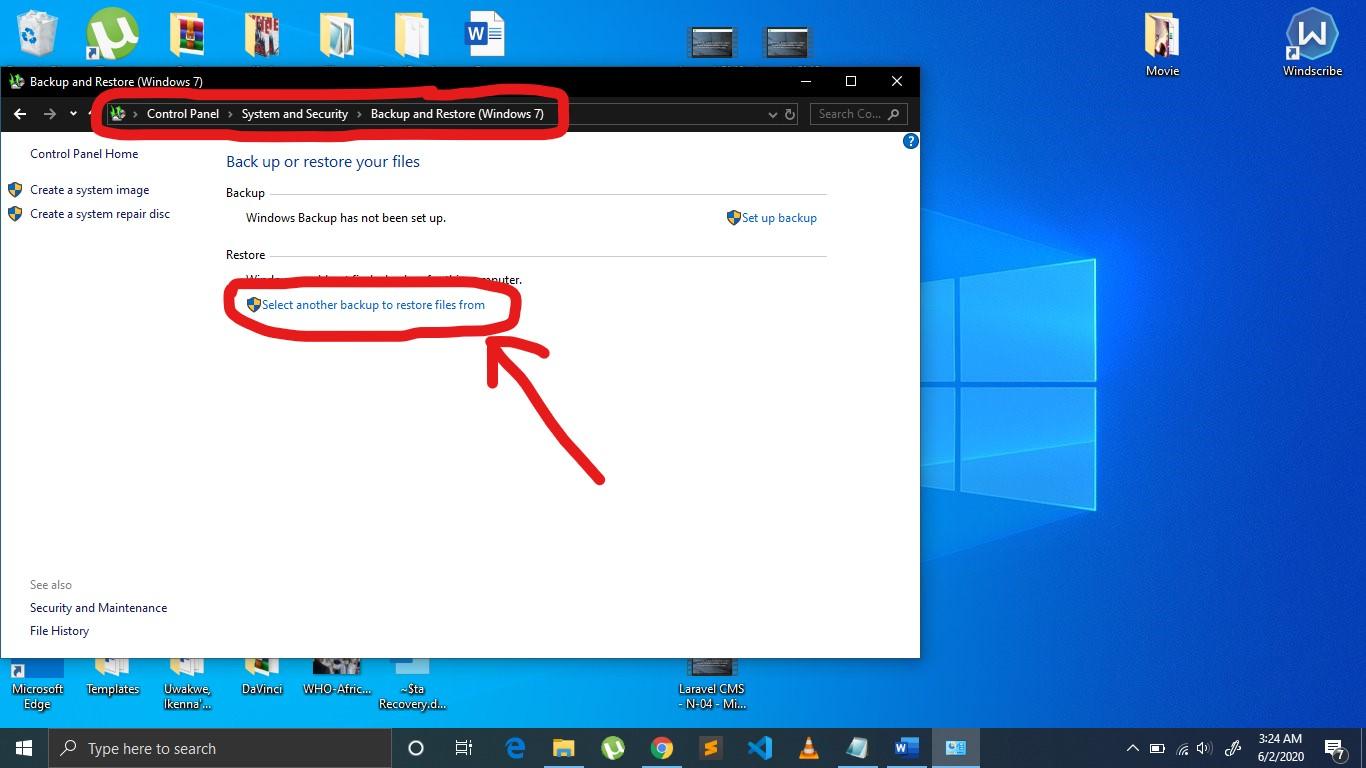
> Next, tap the location of the backup file and follow the steps in the wizard.
Note: If this is your first time doing this and you do not have a backup location set, then you would probably see the link; Select another backup to restore the file from.
Restore From the Previous Version
This process involves the use of a previously saved version of your data, otherwise known as Shadow Copies – which includes information automatically stored by Windows as part of a restore point. For this approach to be practical, you must refrain from using the affected drive immediately after the data loss. From doing this, you prevent over-writing permanently deleted files from the system’s cache of recently deleted items. Consequently, you can recover deleted files on a Windows 10 machine by way of the “File History” feature. The steps for this are as follows.
How to Recover Lost Data in Windows 10 by restoring the previous version
> Click on file explorer from the taskbar and select This PC.
> Navigate to the parent folder of the deleted file or folder and Right-click on it.
> Choose “Restore Previous Versions.”
> From the listed versions that appear, choose an option that dates back to a time when you are sure the deleted file/folder was present in the containing folder.
> Hit “Restore” or drag and drop the file(s) and folder(s) you want to restore out to some other directory on your machine, e.g., desktop.

Note: You should make use of an external hard drive to prevent such occurrences as overwriting data in cases where the desired files are not found in the restored version.
Dedicated Data Recovery Software
In contrast to deleting a file or folder by using the Delete key or Right-click and select Delete from the menu that appears, files and folders that are removed using the combination of the Shift + Delete keys are not sent to the system’s Recycle Bin folder; rather, they are permanently deleted for good. In addition to the Windows utility steps mentioned above, we could also accomplish data recovery through some dedicated data recovery software that employs an advanced algorithm technology to scan every storage compartment of a physical hard drive thoroughly. The following guide outlines how to perform data recovery using the EaseUS Data Recovery Wizard.
How to Recover Lost Data in Windows 10 using dedicated recovery software
> Once you have the EaseUS software installed on your PC, navigate to the exact location from which the files were deleted – whether these files are located on an internal or an external storage medium.
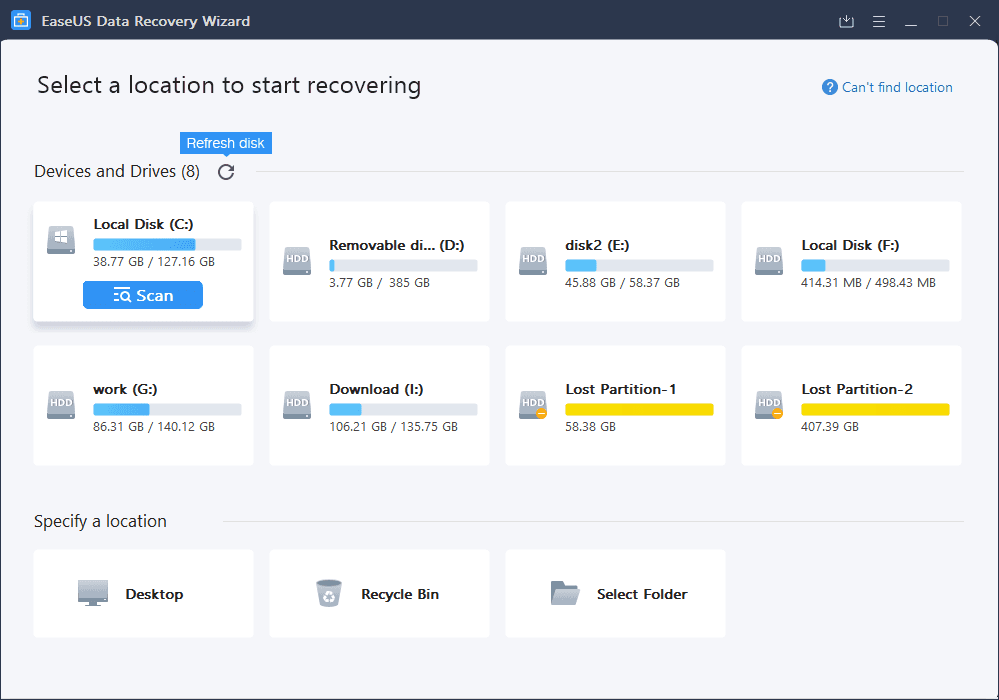
> Click on the “Scan” button. The scanning process will take a few minutes depending on the amount of data housed in the directory you selected for scanning.
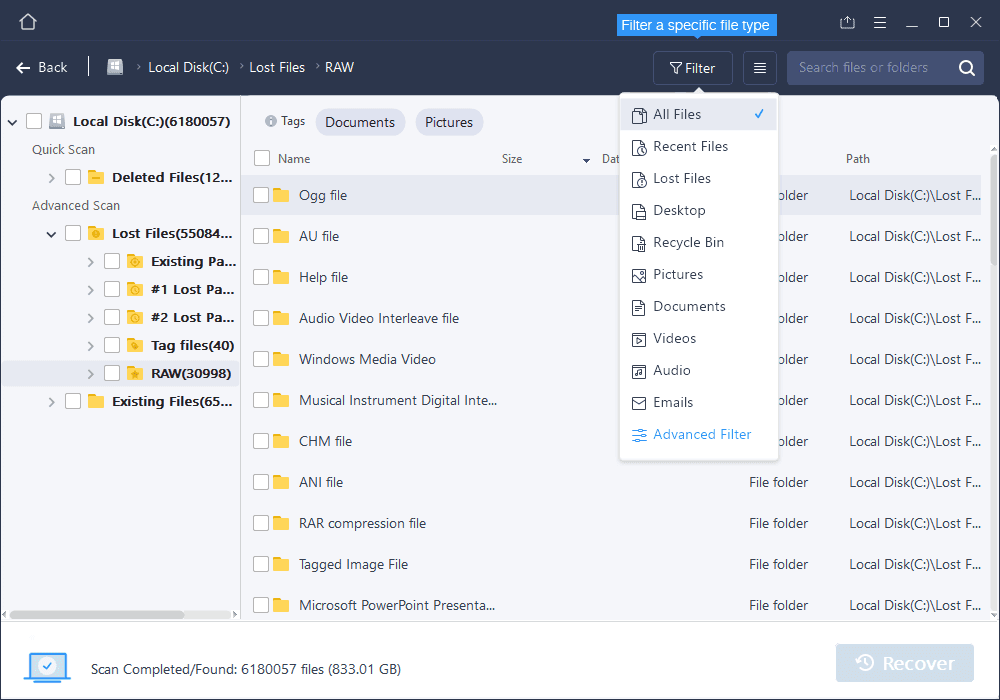
> Once the analytic process is complete, select the file(s) or folder(s) you would like to retrieve.
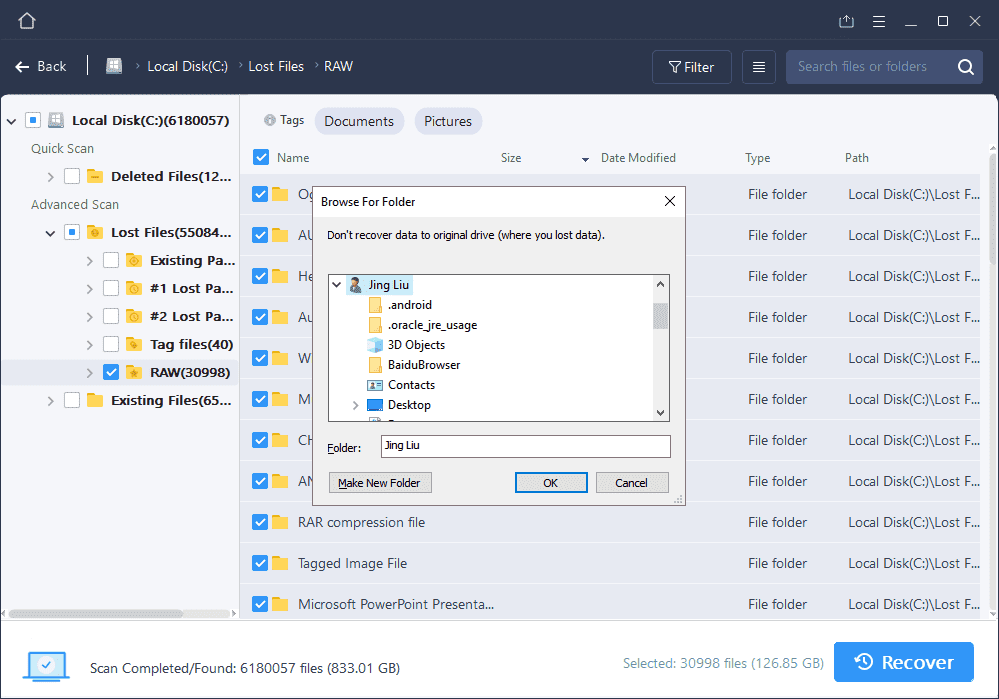
> Next, click on the “Recover” button located on the bottom left of the recovered files window. This will allow you to select a destination for storing the files you intend to improve. Afterwards, tap “OK” to conclude the process.
Note: Do not save the recovered files back to the same directory from which they were restored as this would overwrite the file in that direct. However, you could do this, but only after you have completed the recovery procedure and have saved it to a different folder.
Command Prompt
To conclude, the final way is to perform data recovery using the Command Prompt (CMD) interface. This is the most reliable method as it deals directly with the core of the host machine and is often the last resort used by experts in the field.
To recover deleted or lost data on your device, either internally or from an external hard drive using CMD, you can follow the below:
How to Recover Lost Data in Windows 10 using Command Prompt
> Activate the CMD interface by pressing the “Windows + R” button on your keyboard.
> Type “CMD” into the run dialog box that appears and hit “OK.”
> In the Command Prompt window, enter the following codes;
chkdsk ‘drive letter’ /f
For example: – C:\Users\Program Files\chkdsk D: /f
> Hit enter.
> Press ‘Y’ – for Yes, until the Command line restarts.
> Once restarted, input the ‘drive letter’ once more and hit enter. (This would take the Command line to a refreshed state)
> Enter the following command thus;
[ ‘drive letter’:\> attrib –h –r –s /s /d *.* ]For example: – D:\> attrib –h –r –s /s /d *.*
The command (attrib -r -s drive:\\) recovers all files in the specified storage drive.
In the above examples;
The ‘drive letter’ is represented with the ‘D:’ drive.
‘–r’ represents the Read-only attribute indicating read-only files.
‘–s’ assigns the ‘System’ attribute to the various files selected.
‘–h’ stands for ‘Hidden’ attribute to only the selected files.
‘/s’ command specifies to search the particular path, including subfolders.
‘/d’ represents the process folders.
Note: It is best to create a new folder on your external drive, or PC with all recovered files saved into it. Possibly, the recovered data would most likely have a ‘.chk.’ extension. Change this file extension and save the files accordingly.
Other interesting articles
Learn how to build a budget games machine for under $600